Solar Lighting Blog & News
Latest news, technical guides, and expert perspectives on smart solar street lights, off-grid infrastructure, and clean energy technology.
10 Tips for Choosing Residential Solar Street Lights?
Table of Contents
Choosing the right Residential Solar Street Light is more than comparing prices or counting LED watts. It requires a practical understanding of site conditions, lighting needs, and long-term maintenance. A quiet driveway, a shared residential lane, and a community entrance may need very different systems. Solar exposure matters too. A pole shaded by trees can perform poorly, even with a large battery.
This guide presents ten useful tips for evaluating residential solar street lighting. It considers brightness, panel efficiency, battery capacity, weather resistance, pole height, motion sensors, installation, and warranty support. These factors affect safety, operating costs, and reliability during cloudy winter nights. A quality product should offer clear technical specifications, tested components, and realistic performance claims. Marketing language alone is not enough.
Small details often reveal product quality. Check whether the battery compartment is accessible, whether the light includes intelligent dimming, and whether replacement parts are available. Ask how performance is measured. Is the stated runtime based on full brightness or reduced output? That distinction can change expectations significantly.
There is no universal best choice. An experienced installer may recommend a different configuration after checking local sunlight, soil conditions, and traffic patterns. Even careful buyers can overlook nearby trees or future construction. That is worth admitting. A thoughtful selection process reduces these risks and helps homeowners choose dependable lighting for daily use, seasonal weather, and years of outdoor exposure.
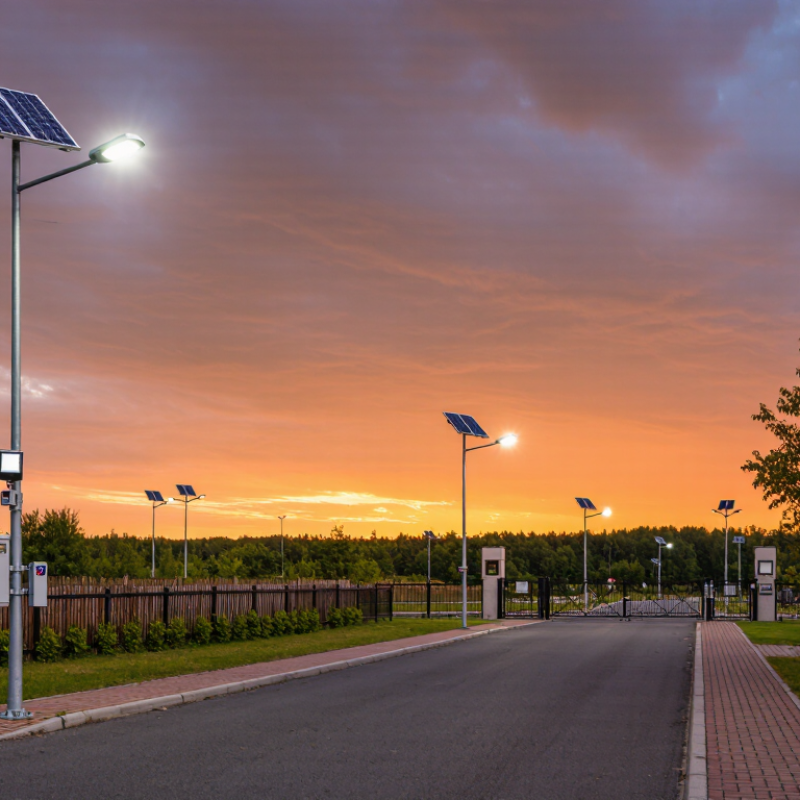
Define Lighting Needs and Installation Conditions
Start with the space, not the lamp. A front path, driveway, and shared access road need different light levels and coverage. Note where people walk, turn, park, or enter after dark. Measure the mounting height and distance between poles; a bright fixture can still leave dark patches if spacing is too wide. The Illuminating Engineering Society’s RP-8 guidance treats roadway lighting needs according to factors such as road use and conflict areas. That is a useful reminder: one setting rarely fits every property. Keep glare out of bedroom windows, too.
Then check the site’s solar conditions. Record hours of direct sunlight across the year, not just on a clear summer afternoon. Rooflines, trees, fences, and neighboring buildings can shade a panel when the sun sits low. The National Renewable Energy Laboratory’s National Solar Radiation Database provides historical solar and weather data for site assessment. Use it as a planning reference, then inspect the actual location. Local shade is easy to underestimate.
Consider the less obvious constraints. Can the panel face a suitable direction without being shaded? Is there a safe, stable place to mount it, and can someone clean or inspect it later? Decide how many hours the light should operate and how it should behave on cloudy nights. Battery capacity and winter sunlight both matter. I have seen neat layouts look convincing on paper, then fail beside a tall hedge. Measure twice; a small site sketch helps.
Compare Solar Panel, Battery, and LED Specifications
A dependable residential solar street light is a matched system, not just a bright LED attached to a panel. Compare the panel’s rated wattage and size, then consider how many hours of direct sun your installation actually receives. A shaded driveway or winter afternoon changes the calculation. Ask whether the light’s stated runtime assumes full brightness all night or a dimmer setting after midnight. Numbers need context.
Battery capacity, often listed in watt-hours or amp-hours, helps show how much energy the fixture can store. Check the battery’s usable capacity, operating temperature range, and expected service life; capacity alone can be misleading. For example, a light that must run through several cloudy evenings needs more reserve than one used briefly beside a gate. Look for practical details about replacement access and charging time, too. Small details matter.
For the LED, compare lumen output, color temperature, beam pattern, and dimming controls. Lumens describe total light, but a narrow beam may leave the path edges dark. A warm-white tone can feel less harsh near bedroom windows, while a motion sensor can raise output only when someone approaches. Check that the panel can recharge the battery during typical local conditions, not only on a perfect sunny day. I would still leave some margin; real weather is untidy, and product estimates can be optimistic.
Evaluate Brightness, Coverage, and Operating Performance
Choosing residential solar street lights starts with the ground they must serve. Measure the driveway, gate, paths, and nearby walls at night. A bright lamp can still leave dark edges. In field assessments, I look for even illumination rather than a harsh white hotspot. Ask for photometric data, not only lumen claims. Target usable light across walking areas, with stronger coverage near entrances. Mounting height, beam angle, and pole spacing change results. A 1,500-lumen unit may work beside a short path but fail across a wide yard. Small details matter.
Evaluate brightness at the surface, not just at the fixture. Lux readings at several points reveal weak corners and glare. Check the center, boundary, doorway, and pavement near steps.
Use a simple night test after installation. Walk the property from different directions. Color temperature also affects comfort; excessively cool light can feel severe near bedrooms.
Motion sensors may increase brightness when someone approaches, while dim standby settings conserve energy. Their detection range must match the path, not the road beyond it.
Operating performance depends on more than battery capacity. Review charging time, autonomy, panel orientation, winter output, and low-temperature behavior. Ask how the light performs after two cloudy nights, not one sunny afternoon.
Inspect seals, cable entry points, and cleaning access. Dust and leaves quietly reduce charging. I once trusted a generous runtime claim and ignored seasonal shade; that was a poor assumption.
Performance estimates should use local weather data and realistic nightly hours. Leave room for adjustment. A perfect specification on paper may disappoint when trees grow or the mounting angle shifts.
Check Durability, Controls, and Maintenance Requirements
Choosing residential solar street lights requires more than checking brightness. Durability decides whether the lamp survives years of rain, dust, and heat. Look for a sealed enclosure rated at least IP65, with corrosion-resistant metal and impact protection around the lens. Ask for battery cycle data, not vague claims like “long life.” NREL’s PV Lifetime Project often uses about 0.5% annual module degradation as a planning benchmark, but batteries usually create earlier failures. Poor ventilation can shorten battery life in hot driveways.
Controls deserve equal attention. A reliable controller should support dusk-to-dawn operation, motion sensing, dimming, and low-voltage protection. Motion detection can preserve energy when nobody is walking nearby. However, an overly sensitive sensor may trigger repeatedly when tree branches move. That is wasteful. The U.S. Department of Energy has reported that advanced solid-state lighting systems can deliver major energy savings compared with conventional lighting, but real performance depends on controls and installation.
Maintenance is often underestimated. Check whether the panel can be wiped safely from ground level, and whether the battery compartment opens without special tools. The IEA PVPS Trends 2024 report recorded more than 1.6 terawatts of global solar capacity by the end of 2023. Solar hardware is mature, yet small outdoor systems still fail through neglected cleaning, loose wiring, or water entry. Request replacement-part availability and a written maintenance schedule. A two-year warranty sounds attractive, but it may hide expensive battery replacement after the warranty ends.
10 Tips for Choosing Residential Solar Street Lights? - Check Durability, Controls, and Maintenance Requirements
| No. | Selection Tip | What to Check | Practical Reference Point | Why It Matters | Maintenance Consideration |
|---|---|---|---|---|---|
| 1 | Match the light output to the area | Review the luminaire's delivered lumens, beam distribution, mounting height, and spacing rather than relying only on LED wattage. | Use a lighting layout or photometric file to verify uniform coverage. | Higher wattage does not automatically provide better illumination or reduce dark spots. | Properly matched optics can reduce glare, energy use, and unnecessary battery cycling. |
| 2 | Evaluate solar resource and panel size | Consider local peak sun hours, seasonal weather, panel orientation, shading, tilt, and the panel's rated power. | Design for the least-sunny season, not only the annual average. | Winter cloud cover and shorter days can significantly reduce daily energy generation. | Keep the panel free of leaves, dust, snow, and overhanging branches; inspect it periodically. |
| 3 | Check battery capacity and chemistry | Confirm usable capacity, operating temperature range, battery protection, cycle life, and replacement accessibility. | Battery sizing should cover the required overnight runtime plus a site-appropriate reserve. | The battery is commonly the component most affected by repeated deep discharge and extreme temperatures. | Choose a replaceable battery module and document its expected service interval. |
| 4 | Verify weather and corrosion resistance | Look for an enclosure ingress-protection rating, sealed cable glands, corrosion-resistant hardware, and suitable outdoor materials. | An IP65 or higher enclosure is commonly selected for exposed outdoor equipment; confirm the complete assembly rating. | Water, dust, salt air, and condensation can damage electronics and shorten service life. | Inspect seals, fasteners, cable entries, and mounting joints for corrosion or water ingress. |
| 5 | Assess structural durability | Review pole strength, foundation requirements, wind-load data, mounting brackets, and impact resistance of the fixture. | Use site-specific wind conditions and soil information when selecting the pole and foundation. | A durable luminaire cannot compensate for an undersized pole, loose anchor, or unstable foundation. | Schedule checks for loose bolts, leaning poles, cracks, vibration damage, and storm-related movement. |
| 6 | Choose suitable lighting controls | Compare dusk-to-dawn photocells, motion sensors, dimming profiles, timers, and manual override options. | Motion-based dimming can reduce nighttime energy demand when full brightness is not always needed. | Effective controls can extend runtime and reduce light pollution while preserving safety in occupied areas. | Test sensor coverage, trigger distance, delay settings, and photocell operation during routine inspections. |
| 7 | Review temperature performance | Check the stated operating range for the LED driver, controller, battery, and enclosure ventilation. | Select equipment rated for the site's actual hot and cold extremes, including battery-specific limits. | Heat can accelerate battery aging, while cold temperatures can temporarily reduce available battery capacity. | Install the battery where it is protected from excessive heat, flooding, and direct radiant heat when possible. |
| 8 | Confirm installation and electrical safety | Check grounding requirements, overcurrent protection, cable routing, mounting access, and compatibility with local codes. | Use qualified installation personnel and follow applicable electrical and structural regulations. | Correct installation reduces shock, fire, water-ingress, and mechanical-failure risks. | Keep wiring diagrams, installation records, torque specifications, and replacement-part information on site. |
| 9 | Calculate total cost of ownership | Compare purchase price with installation, battery replacement, cleaning, inspection, access equipment, and disposal costs. | Use a multi-year cost estimate based on expected runtime and component replacement intervals. | A lower initial price may result in higher costs if batteries or controls fail prematurely. | Prefer modular components that can be serviced individually instead of replacing the entire fixture. |
| 10 | Check documentation and support | Request installation instructions, wiring diagrams, photometric data, test reports, spare-part information, and warranty terms. | Confirm that warranty coverage, exclusions, response procedures, and replacement availability are clearly stated. | Accurate documentation makes troubleshooting, compliance checks, and future upgrades easier. | Maintain an asset register with installation dates, battery changes, inspection results, and fault history. |
Note: Performance requirements vary by climate, site layout, local regulations, lighting standards, and expected operating schedule. Confirm final specifications with a qualified lighting or electrical professional.
Assess Costs, Warranty, and Long-Term Value
10 Tips for Choosing Residential Solar Street Lights
Assess the total cost, not only the purchase price. A lower quote may hide difficult trenching, extra mounting work, or early battery replacement. Ask for an itemized estimate covering poles, fixtures, installation, permits, and maintenance. Compare usable light output, not advertised wattage alone. Check the lighting pattern at driveways, paths, and property corners. Small shadows can create real safety concerns. Consider local sunlight, winter cloud cover, dust, rain, and temperature changes before selecting panel and battery capacity.
Read the warranty carefully, including its coverage period and exclusions. A five-year warranty sounds strong until the battery is covered for only one year. Confirm whether labor, shipping, corrosion, water damage, and reduced battery capacity are included. Request written performance data and independent test reports when available. Look for suitable ingress protection, safe electrical design, and compliance with applicable local standards. Ask how warranty claims are handled. Slow support can turn a small fault into a long outage.
Long-term value depends on serviceability. Choose replaceable batteries, accessible controls, and common components when possible. Record expected battery life and replacement cost in your budget. A bright light that requires a full unit replacement may cost more over ten years. I would also test one unit on site before ordering many. It reveals glare, weak charging, and inconvenient installation details. My earlier assumption was that higher brightness always meant better value. It did not. Balanced light, reliable charging, and simple maintenance usually matter more.
FAQS
Start with the space, not the lamp.
Record direct sunlight throughout the year, not only on clear summer days. Roofs, trees, fences, and nearby buildings may shade the panel. Low winter sun is easy to miss. Inspect the actual site carefully.
The panel needs a suitable direction and an unblocked view of the sky. Choose a stable mounting location. Leave enough access for cleaning and inspection. A simple site sketch helps, although sketches can still miss seasonal shadows.
Look for an enclosure rated at least IP65. Corrosion-resistant metal and impact protection around the lens are useful. Ask for battery cycle information. Rain, dust, heat, and poor ventilation can shorten service life.
Useful controls include dusk-to-dawn operation, motion sensing, dimming, and low-voltage protection. Motion sensing can preserve energy when areas are empty. However, moving branches may trigger an overly sensitive sensor. That wastes power.
Check whether the panel can be cleaned safely from ground level. Confirm that the battery compartment opens without special tools. Request replacement-part information and a written maintenance schedule. Loose wiring and water entry often cause avoidable failures.
Compare the total cost, not only the purchase price. Include poles, fixtures, mounting work, installation, permits, and maintenance. Budget for future battery replacement. A lower quote may conceal difficult work or early repairs.
Read the coverage period and exclusions carefully. Confirm whether the battery, labor, shipping, corrosion, water damage, and reduced capacity are covered. Ask how claims are handled. A long warranty may protect only the easiest component.
A site test can reveal glare, weak charging, dark corners, and awkward installation details. It also shows how the light behaves on cloudy nights. I once assumed brighter always meant better. That assumption was wrong. Balanced lighting may provide better long-term value.
Conclusion
Choosing the right Residential Solar Street Light begins with understanding the area’s lighting needs and installation conditions. Consider the road or pathway size, required lighting hours, sunlight availability, weather exposure, and mounting location. Then compare the solar panel, battery, and LED specifications to ensure the system can collect enough energy, store power reliably, and provide efficient illumination. Brightness, lighting coverage, beam distribution, and nighttime operating performance should match the intended residential environment.
It is also important to evaluate durability, control functions, and maintenance requirements. Look for weather-resistant construction, dependable automatic controls, motion-sensing or dimming options, and components that are easy to inspect or replace. Finally, compare the total cost rather than focusing only on the initial purchase price. A suitable warranty, low maintenance needs, efficient energy use, and long service life can significantly improve long-term value. Careful comparison helps homeowners select a safe, practical, and cost-effective solar lighting solution.

Blog Tags: